Baby Monitor Setup Guide for Secure Home Monitoring
By Hana Ito • 2nd Nov
Did you know that over 60 percent of new parents worry about their baby’s safety at night? Choosing and setting up a baby monitor can turn that anxiety into peace of mind. The right placement and secure installation help you watch over your child, avoid hidden hazards, and ensure your monitor is both reliable and private. Even small mistakes in setup might risk your child’s safety or compromise privacy. This guide gives you practical tips for setting up your baby monitor with confidence.
Quick Summary
| Key Point | Explanation |
|---|---|
| 1. Assess room layout carefully | Identify safe and optimal monitor locations for a clear view of the crib without hazards. |
| 2. Securely install monitor away from crib | Ensure stable placement and keep cords at least three feet from the sleeping area to prevent strangulation risks. |
| 3. Connect monitor to secure network | Choose a strong password and consider a guest network to secure your baby monitor against unauthorized access. |
| 4. Configure strong privacy settings | Use two-factor authentication and manage user access to protect sensitive information from breaches. |
| 5. Test all monitoring features thoroughly | Check video and audio clarity, alerts, and responsiveness to ensure reliable monitoring of your baby. |
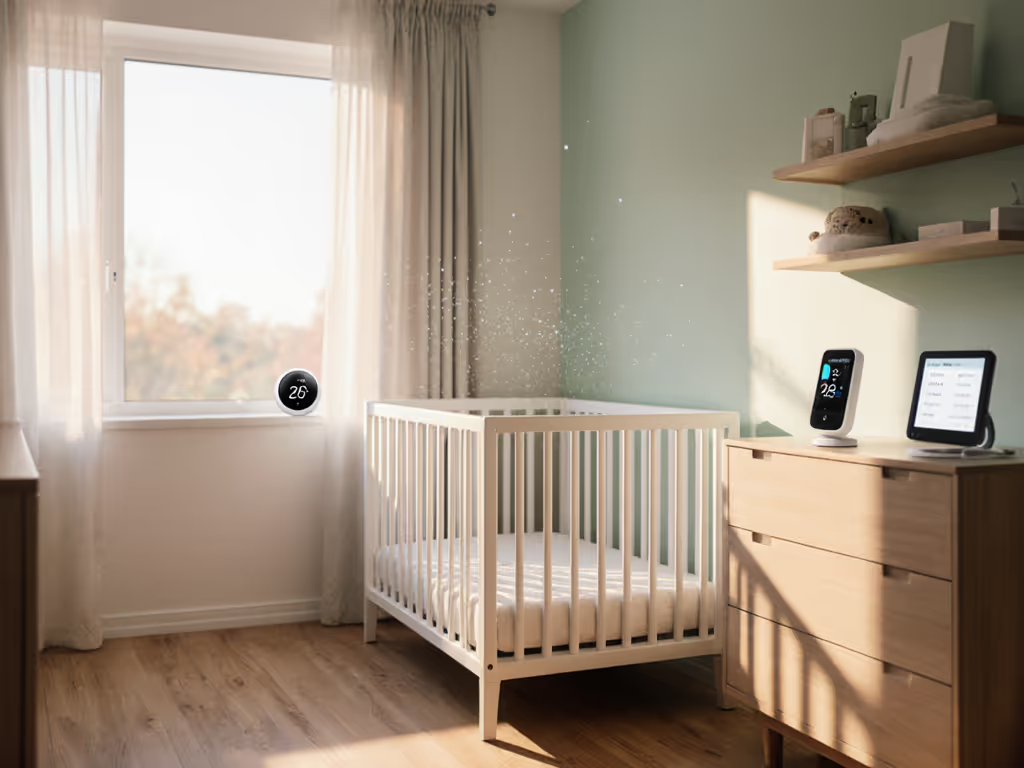
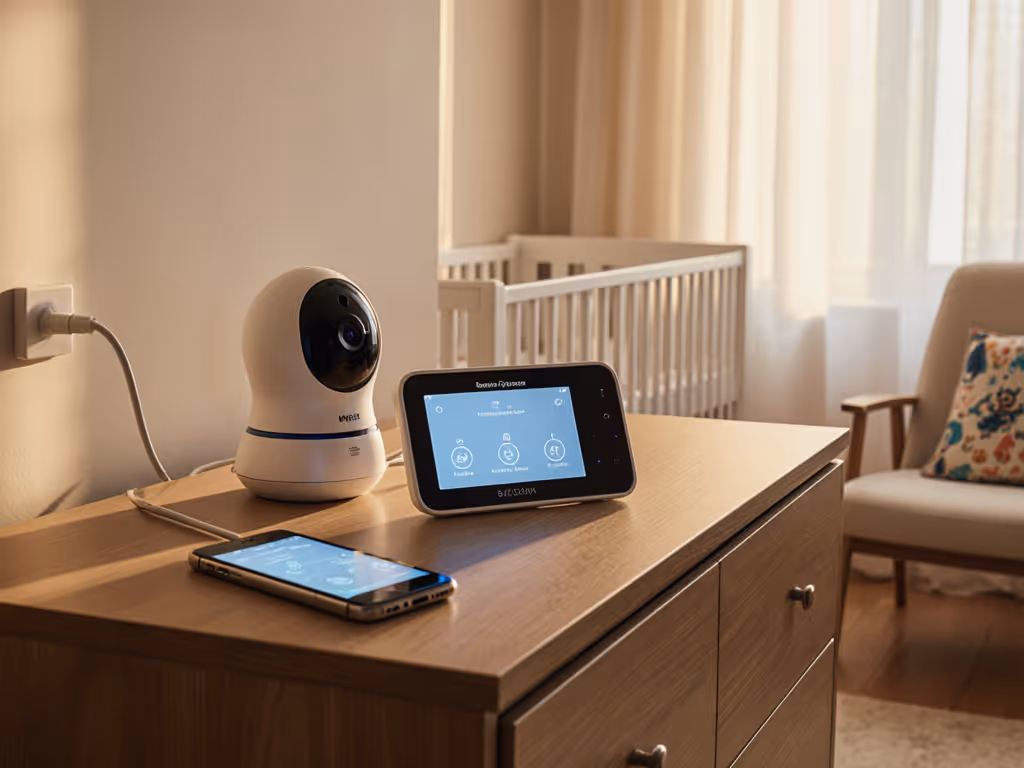
Step 1: Assess room layout for optimal placement
Preparing the perfect spot for your baby monitor starts with a strategic room assessment. Your goal? Creating a clear view of your baby's sleeping area while avoiding potential safety hazards that could compromise monitoring or child safety.
Start by walking through the room and identifying potential camera placement zones. You want a spot that provides an unobstructed view of the crib, preferably mounted on a wall or positioned on a high shelf. Aim to capture the entire sleeping area without any blind spots. Critical zones to consider include areas near electrical outlets, windows, curtains, and potential cord risks.
When selecting your monitor location, follow key safety guidelines from pediatric experts. Position the camera and monitor components far from the crib to prevent cord strangulation risks. Avoid placing equipment near windows, hanging cords from blinds, or electrical outlets that might create tripping or pulling hazards. Your monitoring setup should enhance safety rather than introduce new risks.
Pro Tip: Use a smartphone or temporary stand to test camera angles before permanent mounting. This helps you preview exactly what the monitor will capture and identify potential obstructions.
Once you have mapped out potential locations, you are ready to move to the next critical step of actually setting up your monitoring equipment with precision and care.
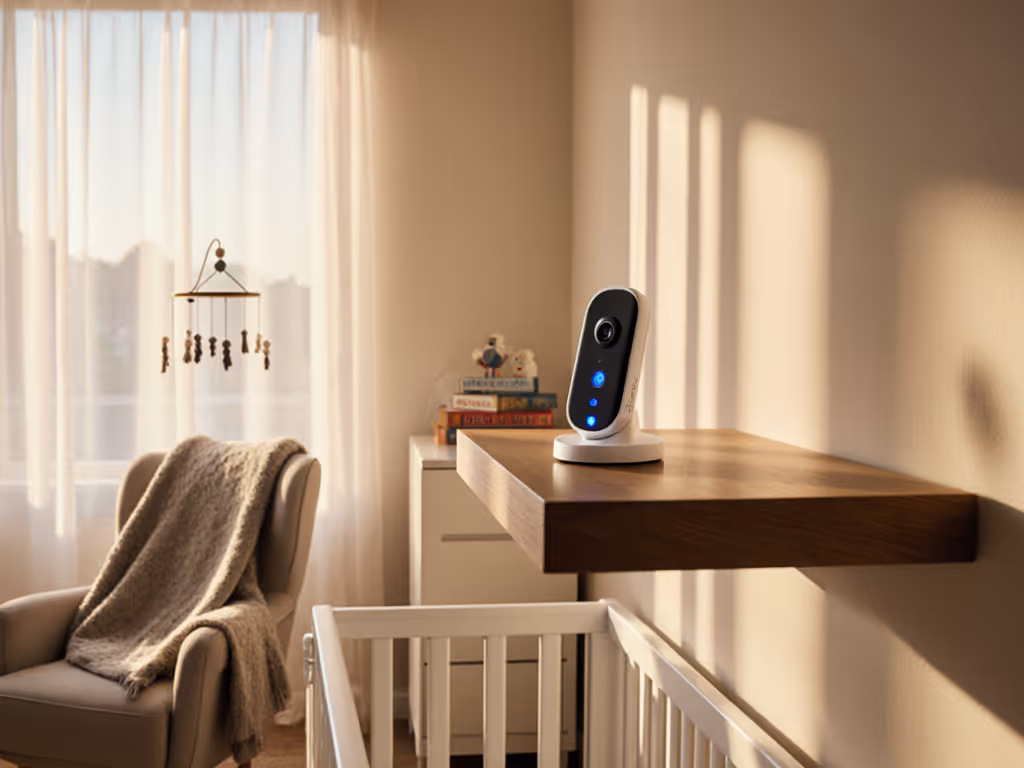
Step 2: Install and position the baby monitor securely
With your room layout strategically planned, it is time to install your baby monitor with precision and safety in mind. Your primary goals are securing the device, ensuring clear visibility of your baby, and preventing any potential hazards from cord placement or mounting.
Begin by carefully selecting your mounting hardware based on your monitor type. For wall mounted units, use sturdy mounting brackets that can support the device weight and provide stable positioning. If using a shelf or dresser placement, ensure the surface is flat, stable, and positioned at least three feet away from the crib. The Consumer Product Safety Commission recommends keeping all monitor cords at least three feet from any part of the sleeping area to prevent potential strangulation risks.
Secure all cables meticulously to eliminate potential pulling or entanglement dangers.
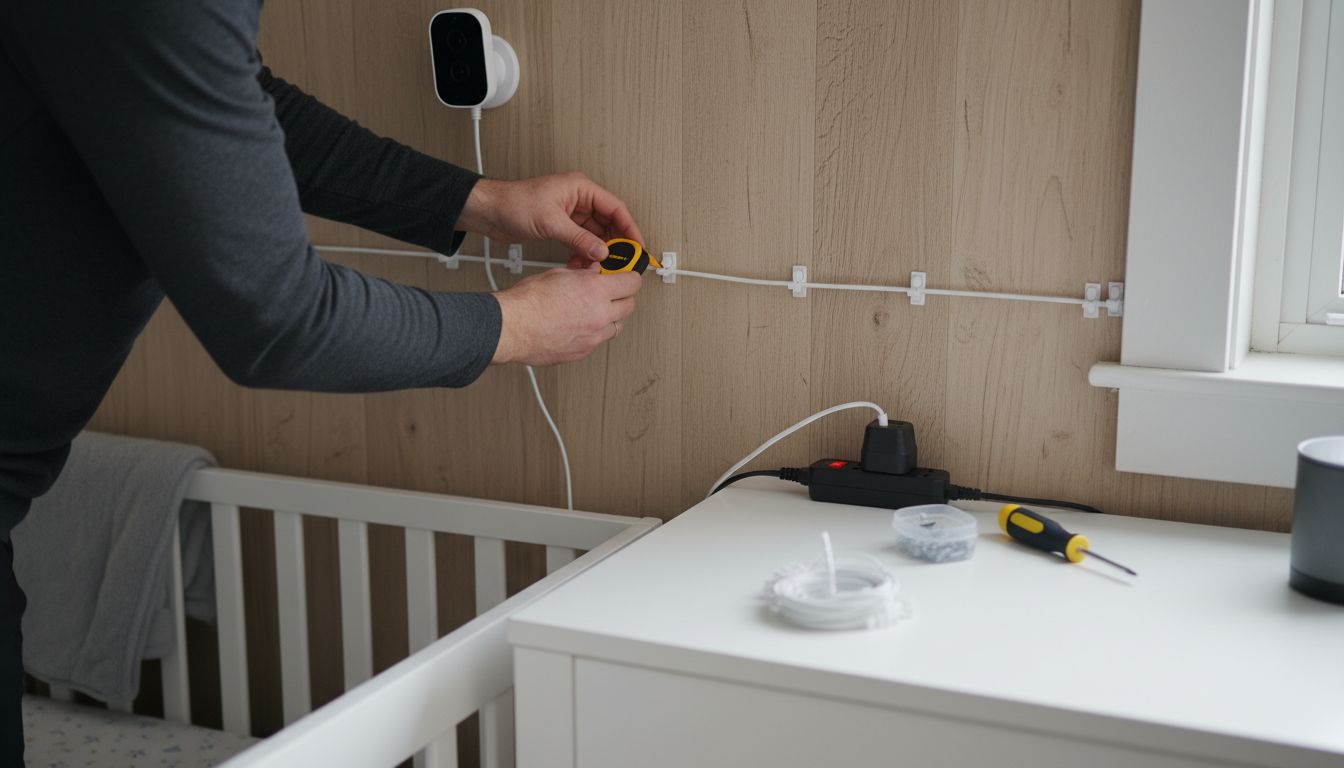 Use cable management solutions like cord clips or cable ties to keep wires taut and out of reach.
![]() Consider wireless options or battery powered monitors if cord management seems challenging. Test the monitor angle and visibility before finalizing the installation to confirm you have a clear unobstructed view of your baby sleeping area.
Consider wireless options or battery powered monitors if cord management seems challenging. Test the monitor angle and visibility before finalizing the installation to confirm you have a clear unobstructed view of your baby sleeping area.
Pro Tip: Use a stud finder when wall mounting to ensure a secure and stable attachment point for your baby monitor.
With your monitor now strategically and safely installed, you are prepared to move forward with configuring its specific monitoring features and settings.
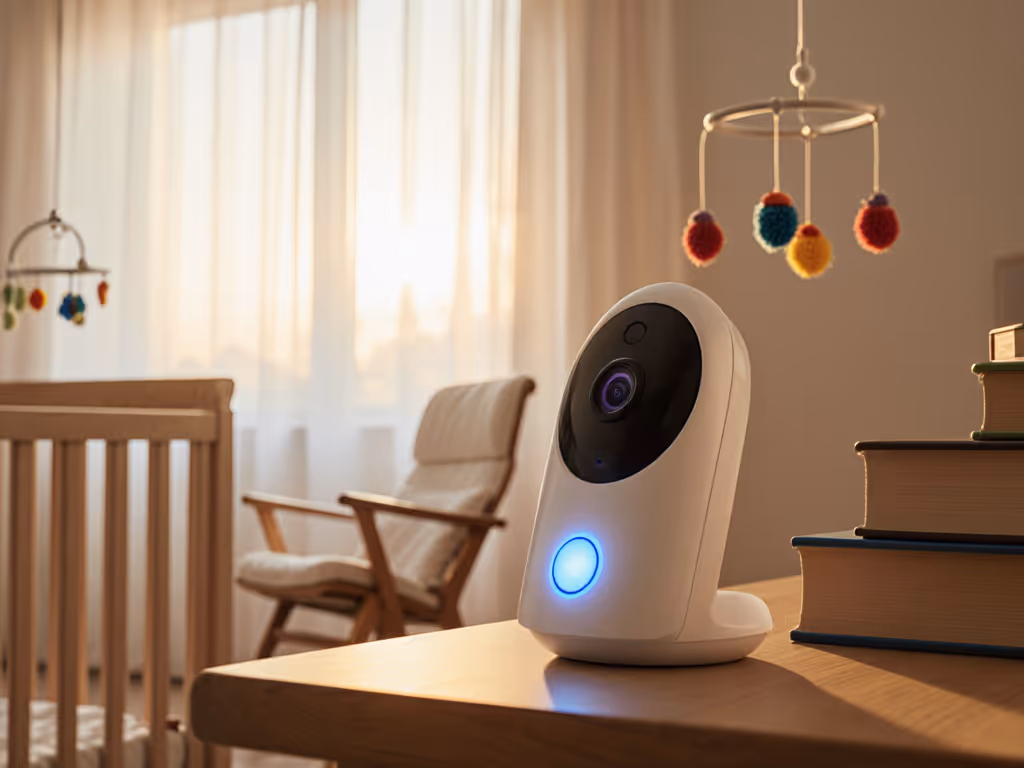
Step 3: Connect the monitor to WiFi or local network
Now that your baby monitor is securely positioned, its time to establish a reliable network connection that ensures seamless monitoring. Understanding your connection options will help you create a robust and secure monitoring system that keeps you informed without compromising privacy.
Start by identifying whether your monitor supports WiFi or requires a local network connection. For WiFi enabled devices, locate the setup or pairing mode typically activated through a dedicated mobile app or a specific button sequence on the monitor itself. Have your home WiFi password ready and ensure you are connecting to a 2.4 GHz network band which typically provides better range and compatibility with baby monitoring devices. During the connection process, carefully follow manufacturer instructions to pair the monitor with your smartphone or base station.
Be mindful of network security while setting up your connection. Choose a strong unique password for your network and consider creating a separate guest network for your baby monitor if your router supports this feature. This extra step helps prevent unauthorized access and adds an additional layer of protection for your monitoring system. Remember that while technology provides excellent supplemental supervision, it should never replace direct visual monitoring as recommended by child safety experts.
Pro Tip: Test your monitor connection in different rooms to confirm consistent signal strength and video quality before relying on it as your primary monitoring method.
With your monitor now successfully connected, you are prepared to configure advanced settings and customize your monitoring experience.
Step 4: Configure privacy and security settings
With your baby monitor connected to the network, its time to fortify your digital security and protect your familys most sensitive information. Your primary objective is creating a monitoring setup that provides peace of mind without compromising personal data privacy.
Begin by thoroughly reviewing the manufacturers privacy settings within the associated mobile app or monitor interface. Look for critical security features like two factor authentication, end to end encryption, and the ability to control user access. Create a strong unique password that includes a combination of uppercase and lowercase letters, numbers, and special characters. Disable any default remote access settings and only enable them if absolutely necessary, ensuring you understand exactly who can view your monitor feed.
Consider implementing additional privacy protective strategies. If your monitor allows multiple user accounts, create separate login credentials for family members and avoid sharing access with unnecessary parties. Review and disable any automatic cloud storage or data sharing features that might transmit your childs images without explicit consent. Regularly update your monitor firmware to patch potential security vulnerabilities and maintain the highest level of digital protection for your monitoring system.
Pro Tip: Set a quarterly reminder to audit your monitor settings and review access logs to ensure ongoing security.
With your privacy and security settings now carefully configured, you have created a robust monitoring environment that prioritizes both technological convenience and personal safety.

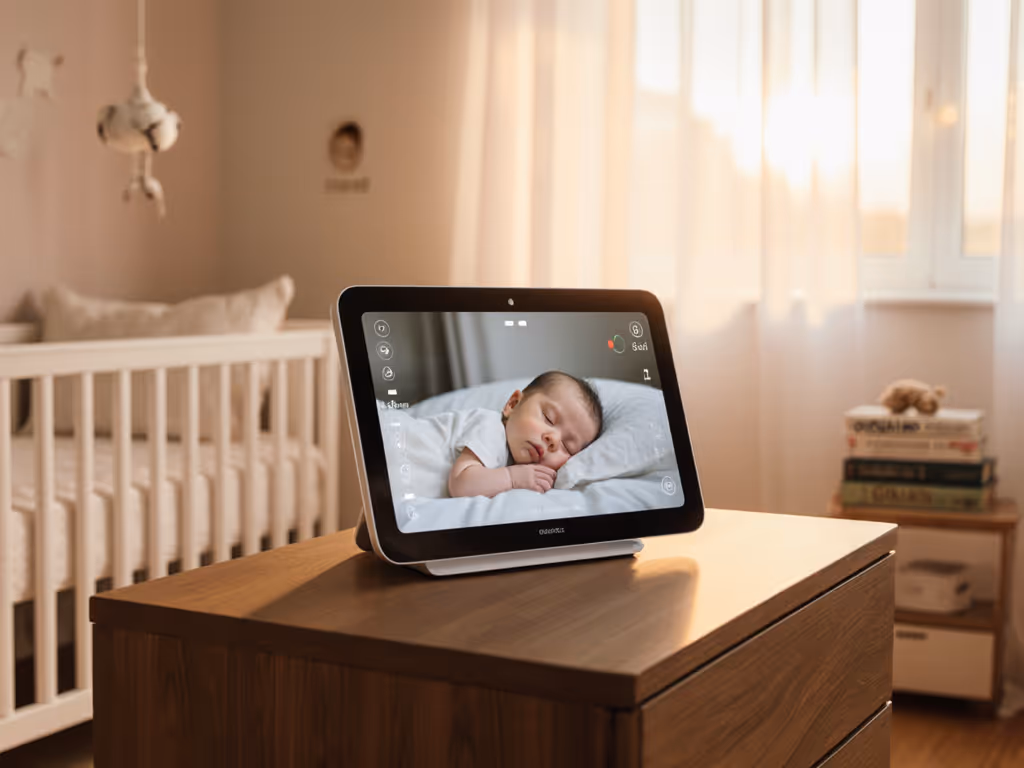
Step 5: Test video, audio, and alert features
Now that your baby monitor is set up and secured, its time to thoroughly verify its performance across all critical monitoring functions. Your goal is to ensure you can reliably track your babys environment and receive timely notifications that keep you informed and responsive.
Begin by conducting a comprehensive functionality test. Start with video quality by checking the clarity and range of the camera feed from different areas of your home. Verify that the night vision mode provides clear visibility and that the zoom features work smoothly. Next, systematically test audio capabilities. Adjust volume levels and confirm you can hear subtle sounds like breathing or soft movements. Pay special attention to the sensitivity settings that trigger audio alerts to prevent unnecessary notifications while ensuring you catch important sounds.
Carefully examine all alert and notification features. Simulate different scenarios by introducing sounds or movements near the monitor to test its responsiveness. Check how quickly alerts are sent to your smartphone or connected devices and verify that notification sounds are loud enough to capture your attention but not so jarring that they might startle your baby. Remember that while these technological tools provide excellent supplemental monitoring, they should never replace direct adult supervision as recommended by child safety experts.
Pro Tip: Create a systematic testing checklist to methodically verify each monitoring feature and document any performance inconsistencies.
With your baby monitor thoroughly tested and validated, you now have a reliable system ready to provide peace of mind and enhanced safety for your little one.
Ensure Your Baby Monitor Setup Delivers Safety and Peace of Mind
Setting up a baby monitor is about more than just placement and connection. It means protecting your child from hazards like cord risks and ensuring the monitor's video, audio, and alert features work flawlessly. If you are looking to confidently implement privacy and security settings to keep your family’s data safe, you are not alone. Many parents struggle with finding a monitor that balances advanced technology with ease of use and robust protection.
Discover expert insights and real-world advice on choosing and setting up baby monitors that excel in safety, privacy, and performance by visiting Baby Monitors for Parents. Learn how top models like the Miku Pro 2 and Nanit Pro stand out in connectivity, encryption, and usability. Start your journey to worry-free monitoring today by exploring our detailed guides and reviews and get one step closer to the confidence only a thoughtfully chosen monitor can provide.
Don’t leave your baby’s safety to chance. Take action now and arm yourself with the knowledge to select the perfect baby monitor that meets your family’s unique needs.
Frequently Asked Questions
How do I assess the room layout for optimal baby monitor placement?
To assess your room layout, walk through the space to identify potential locations that provide a clear view of your baby's sleeping area. Avoid placing the monitor near windows, cords, or electrical outlets, and aim for a spot that allows for unobstructed visibility of the crib.
What safety precautions should I take when installing a baby monitor?
When installing your baby monitor, ensure it is placed at least three feet away from the crib to prevent strangulation risks from cords. Secure all cables properly using cable clips or ties to keep them out of reach, and use a stud finder if mounting on the wall to ensure stability.
How do I connect my baby monitor to WiFi securely?
To connect your baby monitor to WiFi, activate its setup mode and enter your home WiFi password. For better performance, connect to a 2.4 GHz network and avoid using default passwords or remote access settings unless necessary for security.
What privacy settings should I configure for my baby monitor?
Review the privacy settings in your monitor's app to enable features like two-factor authentication and end-to-end encryption. Create a strong password and avoid sharing access with unnecessary users to enhance your system's security.
How can I test the video and audio features of my baby monitor?
Test the video and audio features by checking the camera feed from different distances and areas. Adjust sound sensitivity settings to ensure you can hear important noises while avoiding unnecessary alerts, verifying that each feature works flawlessly before relying on it.
What should I do if my baby monitor alerts are not working properly?
If your baby monitor alerts aren't functioning, first check the volume settings to ensure they’re adjusted appropriately. Then, verify that the sensitivity settings are set correctly to capture important sounds, and retest the monitor through various scenarios to ensure responsiveness.
Related Articles