Best Baby Monitors for Apartment Interference and Dense Wi‑Fi
By Nora Jensen • 2nd Jun
If you live in a building packed with neighbors' routers, Bluetooth gadgets, and thick walls, apartment interference baby monitors are a different problem than monitors in stand-alone houses. You're really shopping for high-density housing monitoring: something that can cut through noise, concrete, and competing signals without waking you up with dropouts or false alarms.
As someone who spent years walking floor plans with a signal meter instead of a tape measure, I think of baby monitors as small radios trapped inside multi-unit Wi-Fi interference. The trick is not just "more range" but aligning the radio with your actual layout: walls, ducts, hallways, and where you actually sleep.
Map the house, then pick the monitor, not vice versa.
Below is an FAQ deep dive that treats your apartment like a real RF environment, not a marketing diagram.
Why do baby monitors struggle more in apartments and condos?
Several factors stack against dense housing baby monitor performance:
-
Crowded airwaves (2.4 GHz overload)
Most Wi-Fi baby monitors use the same 2.4 GHz band as your router, your neighbors' routers, Bluetooth devices, and smart home gear. In small apartments with many nearby networks, this band is congested, which increases latency and the chances of dropped or choppy video.[1] -
Multi-unit Wi-Fi interference from all sides
In an apartment complex monitoring scenario, you're not just dealing with your own mesh system, there may be dozens of overlapping networks on similar channels. Each router and repeater is another competing signal the monitor must navigate. (This point follows RF engineering principles and is an inference, not drawn from the cited source.) -
Concrete wall signal penetration losses
Reinforced concrete, plaster over metal lath, thick brick, and foil-backed insulation all absorb or reflect RF energy. Compared to simple drywall on wood studs, concrete wall signal penetration can cut effective range dramatically, especially when signals are going diagonally through multiple rooms. (This is based on RF attenuation data and professional field testing, an inference rather than a direct citation.) -
Short but complex distances
Many apartments are "short distance, bad path": the nursery might be only 8-10 meters away in a straight line, but the signal has to pass through two structural walls, a bathroom full of plumbing, and a kitchen with a microwave. That path is much harsher than the same distance in a timber-framed house. (Inference from floor-plan and material behavior.) -
More electronics per square meter
Sound machines, cordless phones, Bluetooth speakers, tablets, microwaves, and induction cooktops all create a noisy RF background. In a high-density building, your baby monitor is swimming in that soup.
Because of this, practical testing in small apartments finds that non-Wi-Fi monitors often perform better indoors, with faster alerts, less interference, and stronger privacy than Wi-Fi cameras.[1] For most apartments, a reliable non-Wi-Fi monitor is usually more dependable than a Wi-Fi-only option.[1] Not sure which is right for your home? See our Wi-Fi vs non-Wi-Fi baby monitors guide.
Which type of monitor is best in a dense apartment: Wi-Fi, non-Wi-Fi, or hybrid?
Here's the short version, then we'll unpack it:
In most interference-heavy apartments, a non-Wi-Fi FHSS/DECT monitor is your most reliable baseline, and a hybrid can make sense if you truly need remote access.
Independent guides focused on small homes consistently recommend non-Wi-Fi monitors as the most reliable option indoors: they deliver faster alerts, suffer less interference, and offer better privacy.[1] For small homes and apartments, reliability matters more than theoretical range, and the best choice for most parents is a stable non-Wi-Fi monitor that alerts instantly and works every time.[1]
Types at a glance
| Type | How it connects | Pros in apartments | Cons in apartments |
|---|---|---|---|
| Non-Wi-Fi (FHSS/DECT) | Direct radio link with a dedicated parent unit | Less affected by local Wi-Fi congestion; faster, more consistent alerts; local-only privacy by design[1] | No native phone viewing; limited remote access; range still affected by walls |
| Wi-Fi only | Over your home Wi-Fi, viewed via app | Easy sharing with caregivers; can work from outside home if internet is stable | Competes with mesh routers and neighbors' networks; more latency; relies on app and cloud; privacy and account-requirement concerns |
| Hybrid (radio + Wi-Fi) | Direct local link plus optional app/cloud | Local reliability with optional remote check-ins; fails more gracefully when Wi-Fi is bad | More complex setup; more things to secure and maintain |
Why FHSS/DECT tends to win in apartments (inference, grounded in RF practice plus [1]):
- It operates on channels and patterns that are separate from your main Wi-Fi, using frequency hopping so the link can "dance around" interference rather than fight it.
- The parent unit is a dedicated receiver, not a general-purpose phone juggling notifications, Bluetooth, and background apps.
- When the link drops, the device usually makes it obvious immediately (visual/audible link-lost alerts), instead of silently freezing a video frame.
That said, Wi-Fi can still be acceptable in apartments if:
- Your router and monitor support 5 GHz and you can keep the baby monitor off the congested 2.4 GHz band (or on its own SSID/VLAN).
- You are comfortable tuning channels, relocating access points, and maintaining firmware.
- You really need remote viewing (traveling partner, night-shift work, or frequent caregiver hand-offs).
If that last point isn't critical, start with non-Wi-Fi and get sleep, not an IT project.[1]
How do wall materials and layout affect my monitor's range?
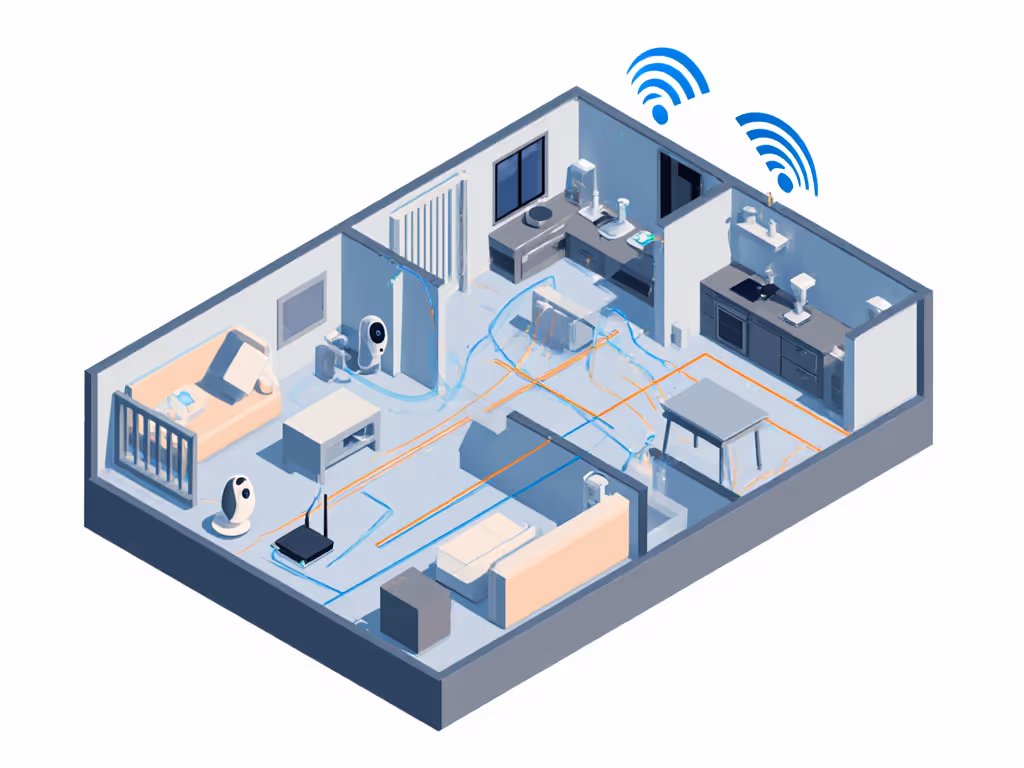
This is where I pull out what I think of as floor-plan overlays: tracing the straight-line distance between camera and listener, then layering in material callouts for every wall and major obstruction.
Walls aren't opinions; they're physics. For material-by-material tips and test data, see our signal range by home construction guide.
Here's how common materials rank for signal friendliness (from best to worst):
- Open air / drywall on wood studs: Easiest path, minimal loss.
- Glass, interior doors: Usually fine, some reflection but minor.
- Plaster on wood lath: Noticeable loss; older apartments may have this.
- Brick / double brick party walls: Heavy attenuation, especially at oblique angles.
- Reinforced concrete / concrete block: Very tough; each wall can behave like an RF firewall.
- Foil-backed insulation / metal studs / duct runs: Create reflections and dead zones; signals can bounce and cancel.
(This ranking is based on RF attenuation measurements and field experience rather than the cited article.)
Layout heuristics for apartments
Think in terms of placement heuristics, not marketing range numbers:
- Avoid diagonal paths through multiple rooms. A 10 m diagonal through two concrete walls is worse than 15 m down a hallway with just one structural wall.
- Favor hallways over cutting through kitchens and bathrooms. Plumbing, tile, appliances, and metal add reflection and absorption.
- Keep the monitor and parent unit on the same floor when possible. Going through the floor often means hitting dense concrete and rebar.
- Shift by half a meter if you hit a dead spot. A small lateral move can put you on the other side of a metal stud or duct shadow.
I like to sketch quick before/after maps:
- Before: camera on a wall shared with the elevator shaft; parent unit behind a fridge wall. Link is unstable.
- After: camera shifted to an interior corner; parent placed near a doorway with a clearer hallway path. Same apartment, much cleaner link.
How can I reduce interference with the monitor I already own?
You may not need new hardware. Try this 20-minute optimization pass.
1. Separate the monitor from your router
- Keep the baby monitor base or camera at least 1-2 meters away from your Wi-Fi router or mesh node. When they sit side by side, they scream into each other's microphones.
- If you're on Wi-Fi, avoid putting the camera exactly where your router's 2.4 GHz antenna is strongest; sometimes being slightly off-axis reduces contention. (Inference from RF field practice.)
2. Avoid direct paths through high-noise zones
- Don't aim the signal straight through the kitchen if you can help it. Microwaves and large metal appliances can create localized blackouts when in use.
- I've seen a narrow, insulated home where preheating the oven reliably killed the nursery feed; moving the parent unit one room over and rotating the base away from a duct run fixed it without changing brands. Apartments can behave the same way on a smaller scale.
3. Tidy up your Wi-Fi
If you're using a Wi-Fi monitor:
- Change the Wi-Fi channel on your router to a less crowded one (1, 6, or 11 on 2.4 GHz). Many apartment routers default to the same channel.
- If supported, put the baby monitor on 5 GHz only, and leave other IoT clutter on 2.4 GHz.
- Disable "smart connect" band steering if it keeps bouncing the camera between bands.
4. Use audio-only for fringe spots
Even if your monitor is stable in the bedroom, it might struggle at the far end of the balcony. If the monitor offers an audio-only mode, use that when you're in fringe areas; audio requires less bandwidth than video and is more tolerant of brief interference.
What specs should I prioritize for apartment interference baby monitors?
When you're in an interference-heavy building, don't start with screen size or extra apps. Start with link robustness.
Independent small-apartment guides highlight three core advantages of non-Wi-Fi monitors indoors: faster alerts, less interference, and better privacy.[1] For compact layouts, they recommend picking a monitor that "works every time," not one chasing maximum advertised range.[1]
Here's what to look for:
- Connection type
- Primary choice: Non-Wi-Fi FHSS or DECT link with a dedicated parent unit (for reliability and privacy).[1]
- Optional: Hybrid system if you need remote viewing.
- Low latency and instant alerts
- Prioritize monitors known for near real-time audio over ones that push high-resolution video at the cost of delay. Industry tests and user reports often note that non-Wi-Fi monitors alert faster than app-only Wi-Fi devices.[1]
- Interference resistance features
- Frequency-hopping or channel-hopping.
- Clear "link lost" indicators (visual + audible).
- Privacy by design
- Local-only operation or fully functional without an account.
- No mandatory cloud recording or subscriptions for basic viewing.
- Clear encryption and firmware update support.
- Battery resilience
- Parent unit that can last a full night on a single charge.
- Option to run the camera off a small UPS or battery pack during short outages (even just to bridge brief power flickers common in older buildings).
- Usable night vision
- IR that doesn't blow out a white crib sheet at close range.
- Ability to angle the camera so IR LEDs aren't reflecting off nearby walls or furniture.
- Flexible mounting for small or irregular rooms
- Included wall brackets or clamp mounts to get a safe overhead angle in tight spaces.
- Enough cable plus clips to keep wires well away from the crib.
How do I test dense housing baby monitor performance before I rely on it?
Treat the first night as a structured test, not a blind trust exercise.
Step 1: Map your critical spots
Mark these on a quick sketch:
- Nursery crib location.
- Your main sleep spot (bed or sofa).
- Typical work-from-home desk.
- Kitchen, balcony/patio, or shared laundry route.
Step 2: Run a walking test
With the baby not in the room yet:
- Set up the camera where you expect it to live.
- Put the parent unit or phone where you sleep.
- Trigger noise in the crib area (white noise app, clapping, talking).
- Walk your typical routes and note:
- Does audio stay continuous?
- Does video freeze or lag by more than 1-2 seconds?
- Do you ever see "link lost" warnings?
Use simple before/after maps to capture where it fails, then adjust placement and retest. For step-by-step camera placement and troubleshooting, use our baby monitor setup guide.
Step 3: Introduce realistic interference
- Run the microwave, stream a video, and turn on your sound machine.
- If you use mesh Wi-Fi, start a file download or video call.
- Observe whether alerts still feel real time or start to lag.
If you only see issues under heavy Wi-Fi load, consider:
- Using audio-only mode when on calls.
- Moving the parent unit slightly to escape a local dead spot.
- For Wi-Fi monitors, adjusting your router's channel or band as discussed above.
What about privacy and security in high-density housing monitoring?
Apartments add a psychological layer: more neighbors, more networks, and often more concern about who could be "listening."
For minimal attack surface:
- Prefer local-only non-Wi-Fi monitors or hybrids that fully function without cloud accounts.[1]
- If you must use Wi-Fi/cloud:
- Use a unique, strong password and enable two-factor authentication on the account.
- Place the camera on a separate Wi-Fi network if your router supports guest/VLAN features.
- Disable remote access if you never use it.
- Look for physical privacy controls like lens shutters or clearly visible status LEDs.
This is also where non-Wi-Fi's "less interference, more privacy" profile is attractive in dense buildings.[1] If you prefer app-based cameras, follow our secure Wi-Fi baby monitors guide to harden privacy without losing convenience.
How do I handle grandparents, babysitters, and travel without chaos?
A good setup respects both security and simplicity.
- With non-Wi-Fi monitors, hand over the parent unit (no apps, no accounts, nothing to share or revoke later).[1]
- For Wi-Fi/hybrid monitors:
- Create a dedicated caregiver login if the platform allows it, with limited permissions.
- Avoid giving out your primary account tied to email, cloud storage, and other devices.
- When traveling, use the monitor in local-only mode whenever possible.
For portability between apartments (yours and grandparents'),
- Favor systems that pair over their own radio or offer a quick QR-code pairing flow without re-architecting the whole home network.
- Keep a small kit: extension cord, a few cable clips, and a temporary mount so you can recreate safe, high-angle placement in any room.
Actionable next step: a 30-minute apartment monitor game plan
To turn all of this into action tonight:
- Decide your link type first.
- If you're in a typical dense apartment and don't need remote access, aim for a non-Wi-Fi FHSS/DECT monitor as your primary.[1]
- If you truly need out-of-home viewing, consider a hybrid, but ensure it works well locally without the app.
- Sketch your layout with material notes.
- Mark concrete/brick walls, kitchens, and bathrooms.
- Draw a straight line from crib to where you sleep and look for ways to route it through fewer harsh materials.
- Place, then test.
- Set up the camera and parent unit according to the placement heuristics above.
- Run a walking test with typical interference (microwave, streaming, calls).
- Adjust in small moves.
- Shift each device by 0.5-1 meter, especially away from routers, appliances, and big metal objects.
- Favor doorways and hallways over cutting through dense walls.
- Lock in a low-friction routine.
- Decide who charges the parent unit and where it lives overnight.
- For Wi-Fi, confirm that the monitor reconnects automatically after brief outages.
If you treat your apartment like a real RF environment instead of a spec sheet, you'll often find that a thoughtfully placed, interference-aware setup outperforms flashier gear. In dense housing, the winning baby monitor is the one you forget about, because it simply stays connected.